
Green Roof Construction: Correct Layering, Waterproofing & Drainage
Last updated:
A green roof is built once. The sequence of works, the watertightness test before adding soil, and the details that cannot be rectified afterwards.
The system at a glance
- ESHAGUM ANTIROOT B5 -10°C | Bituminous root-resistant membrane
- ESHAROOFCOAT No10 ANTIROOT B5 | Anti-root protection for planters
- ESHADIEN ANTIROOT | Bituminous root-resistant membrane
- VANDEX UNIMORTAR 1 | Waterproofing and repair mortar
- ESHAPROTECT | HDPE protective membrane
- QDRAIN C20 65 10F | 20 mm drainage geosynthetic
- Nophadrain ND 4+1h | HIPS Composite Dimpled Drainage Membrane
- GEODRAIN | Perforated drainage pipe
- GEODRAIN PLUS | Drainage pipe with geotextile
- FIBRANfilter SF32 | PP geotextile
Solutions & Applications · Green Roof / Roof Garden
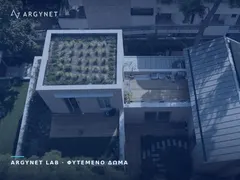
A green roof is built once. Any mistakes made beneath the soil cannot be rectified without stripping back the garden — plants, substrate, drainage, protection — until the waterproofing is exposed again. This page does not describe which materials are used, but how they are brought onto the site and what is checked before each layer is sealed.
For the selection of the system — extensive or intensive, type of drainage, loads per m² — see the solution Green roof. This is where we begin once the system has been decided upon.
Before the contractor crew starts work
| Check | What is confirmed | Why before, not after |
|---|---|---|
| Static load | The weight of the system in a saturated state — wet substrate, plus plants, plus usage | The dry substrate weighs considerably less than the wet one; checking using the dry weight underestimates the actual load |
| Slab gradients | Solutions for drainage, without areas of water pooling | Water that pools beneath the soil is not visible; only the rotting plants are visible |
| Drainage & overflow | Gutter positions and secondary water drainage route | If a drain becomes blocked, the water must have somewhere to go before it rises above the floor level |
| Irrigation & access | Water supply, inspection point, maintenance route | Pipes added subsequently pierce through layers that have already been sealed |
The scope of works
- Slab preparation: clean, dry, with all screeding completed. Curved flashings at the floor-parapet corners, so that the waterproofing does not form a right angle. Gutters are fitted with their flanges in place before waterproofing.
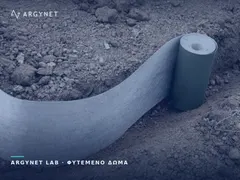
- Root-resistant waterproofing: the root-resistant membrane is laid with overlapped seams and rises up the parapets to at least 15 cm above the finished level of the substrate. If it ends lower than this, water and roots will pass over it.
- Details: guttering, penetrations and joints must be treated with root-barrier material. A single piece of standard bituminous membrane at a corner locally nullifies the entire protection.
- Waterproofing test: before applying any subsequent layer — see below.
- Protective membrane: to be installed immediately after testing, before anything else comes into contact with the waterproofing.
- Drainage: the drainage membrane is laid with the filter facing upwards and the overlaps, of at least 10 cm, in the direction of flow — the upstream sheet should lie above the downstream sheet, as with roof tiles, so that water flows over the top rather than underneath.
- Drainage: an inspection chamber above each drainpipe and a gravel-filled planting-free zone around it and along the perimeter.
- Water collection: a perforated pipe with geotextile where the surface or planting requires it.
- Substrate: lay in layers, without using machinery on top of the membrane and without piling material up in one spot.
- Planting and irrigation.
The waterproofing test must be carried out before the backfill is laid — it must never be carried out afterwards. It is the most cost-effective safeguard for the entire project.
Drains are temporarily blocked and the surface is flooded with a few centimetres of water for at least 24 hours — often 48. During this time, the ceiling of the space is inspected from below, along with the corners and penetration points. On large flat roofs, the flooding is carried out in sections.
A leak detected at this stage can be rectified within an hour. The same leak, once the substrate and plants have been laid, means that it must first be located — beneath tonnes of soil — and then the garden must be dug up to reach it. The test is documented with the date and photographs.
The greatest risk to waterproofing is the gardening contractor crew
Once the waterproofing is complete, the work passes into other hands — and into a different working culture. The landscaping contractor crew works with spades, stakes and rakes, often without realising what lies just a few centimetres beneath their feet.
- No piles are driven into the flat roof. Trees are anchored using systems that secure the root ball within the subsoil, not with piles that extend down to the waterproofing.
- Bags of substrate should not be stacked in one place. A pallet of substrate weighs as much as several square metres of a finished garden — concentrated within a single square metre, it may exceed the design load of the slab.
- No excavation down to the drainage layer. The planting pit ends within the sub-base.
- Written notification: the landscaping contractor crew must be provided with the stratification and depths before commencing work.
Acceptance: what is recorded before each layer is completed
Once planted, none of the following is visible any more. Photographic documentation is the only proof that the work was carried out correctly:
| Stage | What is being photographed |
|---|---|
| Waterproofing | Overlaps, dimensioned parapet details, guttering details and penetrations |
| Waterproofing test | The flooded area, with the start and end dates and times; the ceiling from below |
| Protection & drainage | Seamless coverage, direction of overlaps, filter facing upwards |
| Drainage | Inspection chambers in position, gravel zone |
| Substrate | Thickness in several places, measured |
Maintenance: drainage requires access
A green roof is not a maintenance-free structure. Inspection chambers are there to be opened:
- Inspect and clean the drains twice a year, particularly after the leaves have fallen in autumn.
- The gravel bed must be kept free of vegetation. Plants growing within it turn it into a substrate and send their roots towards the drains.
- No repairs using standard materials: any future work on the waterproofing must be carried out using root-resistant material.
Drainage: two approaches
| QDRAIN C20 65 10F | Nophadrain ND | |
|---|---|---|
| What is | 20 mm drainage geosynthetic with geotextile | Composite drainage sheet with water storage |
| When | Flat roofs, roof gardens, planters — the cost-effective choice | Dense planting, accessible gardens, increased requirements for water retention and storage |
In both cases, the combination of a perforated pipe with geotextile provides a dual filter: the geotextile acts as a filter to retain the substrate, whilst the perforated pipe acts as a filter to retain anything that has escaped. The drainage system does not become blocked over time — provided the drainage wells are inspected regularly.
Waterproofing & Details
Protection, Drainage & Water Disposal
Related Solutions from ARGYNET LAB
Was a waterproofing test carried out before the soil was laid?
Request a Technical Quotation