
Guide to Waterproofing Planters: How to Stop Water and Roots?
Last updated:
Flexible does not mean root-resistant. How to properly waterproof a balcony planter — before water starts to show through on the ceiling below.
The system at a glance
- ESHAGUM ANTIROOT B5 -10°C | Bituminous root-resistant membrane
- ESHAROOFCOAT No10 ANTIROOT B5 | Anti-root protection for planters
- ESHADIEN ANTIROOT | Bituminous root-resistant membrane
- VANDEX UNIMORTAR 1 | Waterproofing and repair mortar
- ESHAPROTECT | HDPE protective membrane
- MAXISTUD GEO | 20mm HDPE dimpled drainage membrane with geotextile
- FIBRANfilter SF32 | PP geotextile
- ESHADESMOLAST TR | Transparent polyurethane
- ESHADESMOLAST | 1C polyurethane waterproofing
Solutions & Applications · Waterproofing
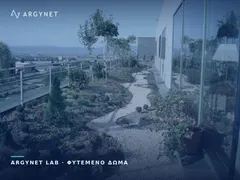
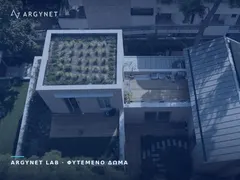
The built-in planter on the balcony is a small project with disproportionate consequences: it is situated above a living space. When it fails, the damp does not appear in the planter — it appears on the ceiling of the floor below, and the repair work affects two properties.
Two different properties that are often confused
The most common mistake is not poor installation but the wrong choice of material — and it stems from a reasonable misunderstanding:
| Property | What it ensures | How it is documented |
|---|---|---|
| Flexibility | Crack bridging, tolerance to thermal expansion and contraction, resistance to mechanical stress | Elongation at break — e.g. >450% |
| Root barrier protection | The root does not penetrate the layer | Special additive for the formulation and testing of root penetration |
One does not imply the other. A highly elastic material deforms in the presence of a root rather than preventing it — and the root does not push with force, but grows into any available void. Root resistance is not a mechanical property; it is a chemical one, and results from a specific additive.
Specify the root-barrier material by name — do not infer it from its elasticity. High-quality polyurethane and bituminous waterproofing products are available on the market which do not contain a root-barrier additive, whilst others in the same product family do. These are distinct product codes, with different compositions and different prices, and they often look identical in the container.
It’s easy to check: the technical data sheet for the specific product code explicitly states whether it has root-resistant properties or contains an additive. If it doesn’t mention it, it doesn’t have it — however flexible it may be.
At ARGYNET, we specify the planter as a complete system: channels, root barrier layer, drainage and runoff.
Step 1 — Preparation and drainage channels
The surface must be clean, stable and free from any weak spots.
The critical point is the curved joint (ditch) at the bottom-to-wall corners, using a waterproofing repair mortar. The 90° right angle is the weakest point in any waterproofing system for two reasons: this is where water collects, and this is where the applied layer naturally becomes thinner, however well it is installed. The gutter eliminates both problems.
Step 2 — The root barrier layer
This is where the choice that determines the success of the project is made. Two technologies, with different applications:
| Option A — Bituminous membrane | Option B — Liquid-applied coating for root-barrier | |
|---|---|---|
| Material | ESHADIEN ANTIROOT — bituminous membrane with anti-root additive | ESHAROOFCOAT No10 ANTIROOT B5 — hyper-elastomeric solution with Preventol® B5 |
| Scope | Large surfaces, green roofs, planters with simple geometry | Small planters and complex geometries — corners, parapets, crossings |
| Advantage | Documented layer thickness, controlled sheet quality | Seamless — and where there is no seam, there is no point of entry |
| Please note | Overlaps and corners require careful attention; any repairs are carried out using root-resistant material | Protection depends on thickness — insufficient application means locally non-existent protection |
In a balcony planter, where there are more details than surface area, the liquid-applied coating usually predominates: a 1.5 × 0.5 m planter has eight edges and two corners at each end — that is, more details than a flat surface.
The flashings on the walls terminate above the final ground level. If it stops lower down, roots and water will simply pass over the top, and the entire waterproofing system will be bypassed.
Step 3 — Drainage and protection
The most common construction error. Even perfect waterproofing fails if water stagnates: plants rot, hydrostatic pressure increases, and the layer is subjected to a permanent load for which it was not designed.
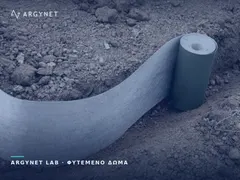
The dimpled drainage membrane is installed on the floor and walls and performs two functions simultaneously:
- Mechanical protection: shields the waterproofing layer from chipping, tools and stones in the substrate.
- Drainage: directs excess water towards the drainage holes.
MAXISTUD GEO features an integrated geotextile that filters the soil and allows only clean water to pass through. Without a filter, the fine particles from the substrate are carried along, fill the channel and block the holes — and the planter turns into a closed reservoir.
The holes must be present and remain open
- Position: at the lowest level of the base, with a slight slope towards them.
- Outlet: to a drainpipe or a controlled drainage point — not onto the balcony floor, where it causes stains and damp on the façade.
- Access: a point that can be inspected and cleaned without emptying the planter.
Step 4 — Filling
A layer of lightweight aggregate or gravel is laid over the dimpled drainage membrane, followed by the garden soil. Lightweight aggregate is preferred on balconies: it offers the same drainage function with a significantly lower dead load — a factor that is by no means negligible on a balcony cantilever.
Summary of materials
| Layer | Material | Role |
|---|---|---|
| Preparation | Waterproofing repair mortar | Drainage channels at corners, levelling |
| Waterproofing | Root-resistant membrane or liquid-applied coating | Waterproofing and root prevention |
| Protection & drainage | Dimpled drainage membrane with geotextile | Waterproofing, drainage, filtration |
| Drainage layer | Lightweight aggregate or gravel | Additional drainage, weight reduction |
| Fill | Horticultural soil | Planting substrate |
Design series
- What lies beneath: living space, cantilever or ground — determines the acceptable level of risk and the load.
- Planting materials: seasonal plants or shrubs and saplings — this determines the strength of the root system.
- Geometry: ratio of detail to surface area — choose between a membrane and a liquid-applied coating.
- Drainage route: where does the water from the holes end up, before any other decision is made?
- Elevation of the structure in relation to the final ground level.
- Repair protocol: written instruction that any future work must be carried out using root-barrier material.
Root-resistant waterproofing
Preparation, Drainage & Protection
Waterproofing the Remaining Balcony
Related Solutions from ARGYNET LAB
Does your material’s brochure explicitly state that it is root-resistant?
Request a Technical Quotation