
Technical Guide to Thermal Insulation and Waterproofing of the Flat Roof with Polyurea
Last updated:
Five stages, and only the last one involves waterproofing. Warm flat roof with cold polyurea — and the points where the application fails.
The system at a glance
- ESHACOAT 6S | Elastomeric bituminous emulsion
- VANDEX UNIMORTAR 1 | Waterproofing and repair mortar
- FIBRANxps 300 | Flat roofs
- FIBRANxps INCLINE | Creating slopes
- CERESIT CT 84 | Low-expansion polyurethane foam
- SINMAST S2 WB | Water-based epoxy primer
- ISOPLAST FC/A | 2-component polyurea membrane
- ESHADESMOLAST | 1C polyurethane waterproofing
Solutions & Applications · Liquid-applied membranes
Five stages, of which only the last is ‘waterproofing’. The first four determine whether the fifth will hold — and the overwhelming majority of failures on polyurea-coated flat roofs are not due to the material, but to the substrate onto which it was applied.
What is this provision — and what is the alternative?
This is a flat roof: a vapour barrier on top of the slab, insulation above, screeds, and the waterproofing exposed on the surface. The alternative is an inverted roof, where the sequence is reversed.
| Warm flat roof — this solution | Inverted roof | |
|---|---|---|
| Waterproofing location | Above, exposed | Beneath the insulation, protected |
| Vapour barrier | Required beneath the insulation | Not required — the waterproofing takes care of it |
| Waterproofing stress | UV and temperature cycles — require a material with high elasticity | Virtually constant temperature, zero UV |
| Finished surface | Permeable and visible — the membrane itself | Ballast: gravel or slabs |
| Ideal for | Flat roofs requiring access, limited headroom, refurbishment | Flat roofs where the service life of the waterproofing is a priority |
The third line explains why polyurea is chosen here rather than a cheaper liquid-applied coating: the membrane remains exposed to ultraviolet radiation and to a daily temperature range of tens of degrees, undergoing thousands of cycles per year. Elasticity is not a luxury — it is a prerequisite for survival.
Phase 1 — Preparation and vapour barrier
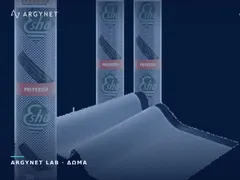
The concrete surface must be clean, free from loose material and completely dry. ESHACOAT 6S is applied as a vapour barrier, preventing internal water vapour from becoming trapped beneath the insulation.
- Two cross-laid layers — the second at right angles to the first, so as to fill in the gaps.
- Pay particular attention to the joints and the floor-parapet corners.
This position is not arbitrary: the barrier is always installed on the warm side — beneath the insulation, on top of the slab. If installed on top, it traps moisture within the insulation rather than preventing it.
Phase 2 — Thermal insulation
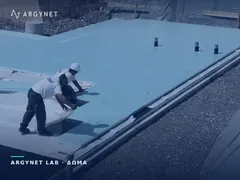
FIBRANxps 300 panels are laid side by side and bonded together. The configuration of their edges (L-cut) eliminates the linear thermal bridge at the joint — a continuous straight joint running through the entire thickness would act as a thermal bridge along its entire length.
Any gaps are filled with low-expansion polyurethane foam. In two layers, the joints are laid crosswise.
Phase 3 — Solutions: the time-consuming phase
Sloped screed directs water towards the drains with a minimum gradient of 1.5–2 per cent. Without proper drainage, no waterproofing will last for decades — standing water is a constant strain, not an occasional one.
The problem is time: 21 to 28 days’ curing time before the polyurea can be applied. On a project with a tight schedule, this represents a whole month of downtime in the middle of the process.
Slopes can be created using the insulation material itself. FIBRANxps INCLINE is XPS of variable thickness, which creates the slope within the insulation layer. This has three benefits:
Time: the 28-day waiting period is abolished — the next phase begins immediately. Load: the levelling screed is dead load on the slab; the insulation is lightweight. Thermal performance: the thickness that creates the slope insulates rather than adding weight, and does so even more effectively where the slope is steeper.
The mortar solution remains appropriate where the substrate is uneven or where significant levelling is required. However, on a new slab with acceptable flatness, the waiting period is an option — not a necessity. At ARGYNET, we calculate the layer thickness based on the cross-section of the flat roof and the materials per m².
Stage 4 — Priming
SINMAST S2 WB acts as a bridge between the cementitious substrate and the polyurea. As a two-component, water-based epoxy primer, it seals the pores and creates a surface with high adhesion.
- Mixing: each component separately, then together, using a low-speed mixer — the entrapped air forms bubbles in the final layer.
- Recoating window: the next coat must not be applied until the previous coat has dried completely, but no later than the time specified in the leaflet — after that, adhesion is reduced and the primer must be reapplied.
- Solvent-free: odourless and suitable for use in confined or residential environments.
Phase 5 — Waterproofing with polyurea
ISOPLAST FCA is a two-component cold-applied polyurea. The distinction from hot-sprayed polyurea is both practical and commercially decisive:
| Cold polyurea — ISOPLAST FCA | Thermosprayed polyurea | |
|---|---|---|
| Application | Roller or trowel | Specialised twin-chamber machine with heating and high pressure |
| Contractor crew | Waterproofing contractors | Certified installer with own equipment |
| Project scale | Suitable for both small areas and complex details | Suitable for large, continuous surfaces |
| Result | Single-piece membrane without joints | Single-piece membrane without joints |
The conclusion for the specifier: cold polyurea provides the same kind of result — a continuous, seamless membrane, resistant to standing water and extreme temperatures — without restricting the project to one of the few installers who possess thermal spraying equipment.
The pot life is limited. The work is organised into sections that can be completed within the pot life, with personnel and materials ready before mixing.
The four areas where the project falls short
- Substrate moisture — the number one cause. It is measured using a moisture meter, with a limit of less than 4–5 per cent. Please note: the surface may appear dry whilst the depth of the screed is not. Any moisture that has not escaped will do so later — and will cause the membrane to blister.
- Drainage channels and guttering. At floor-to-wall junctions, a curve is formed using repair material before the primer is applied. The polyurea must not form a 90-degree angle — this is where stress concentrates and where it will tear first.
- Weather conditions and dew point. Avoid application when rain is forecast or when the temperature is close to the dew point; condensation on the surface causes the material to detach. The rule is that the substrate temperature must be at least 3 °C above the dew point.
- Mixing ratio. If the entire container is not mixed, use electronic scales. An incorrect ratio of A to B will result in a material that will never set — and cannot be repaired; it must be removed.
And two more that are not often mentioned
- Upstand at parapets: the membrane is raised up the vertical surfaces and secured by mechanical fastening and sealing, above the level to which water may rise.
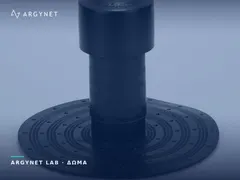
- Reinforcement at guttering outlets: each outlet is a localised concentration of flow and stress; it is reinforced with an additional layer or tape prior to the general application.
Preparation & Vapour Barrier
Thermal Insulation & Solutions
Priming & Waterproofing
Related Solutions from ARGYNET LAB
Was the moisture content of the mortar measured — or just its surface?
Request a Technical Quotation