
Construction of an external waterproof basement envelope
Last updated:
The external waterproof basement envelope encases the basement in a single, watertight shell — and most of it will never be seen again. The guide begins with th
The system at a glance
- ULTRAPLY™ TPO Membrane | Thermoplastic polyolefin membrane
- NW Standard | Non-woven polypropylene geotextile
- PNW Protection | Geotextile for the Mechanical Protection of Geomembranes
- ESHAPROTECT | HDPE protective membrane
- ESHAFIN SBS -10 | Elastomeric bituminous membrane
- ESHAGUM APP -10 | Polymer-modified bituminous membrane
- ESHATOPRIMER | Adhesive primer for bituminous membranes
- CERESIT CR 166 Flexible 2-K | Flexible cementitious waterproofing compound
- ESHAHYDROBENT | Water-swelling bentonite cord - waterstop
- PVC Waterstop | Waterstop tapes for concrete joints
- QDRAIN C20 65 10F | 20 mm drainage geosynthetic
- DANODREN H15 PLUS | HDPE dimpled drainage membrane with geotextile
- DRAIN E 400 | Dimpled drainage membrane
- GEODRAIN PLUS | Drainage pipe with geotextile
- FIBRANxps ETICS GF | External Wall Insulation
Solutions & Applications · Basement & Foundation
The waterproof basement envelope ‘encases’ the lower part of the building in a single, watertight shell. However, it has a distinctive feature that no other waterproofing system possesses: the majority of it will never be seen again. Once the floor slab has been concreted, any mistakes made underneath remain mistakes forever.
First, the water condition
The waterproof basement envelope is not designed in the same way for every basement. The first decision is a geotechnical one:
| Condition | What does this mean? | Consistency in design |
|---|---|---|
| Percolating water | Rainwater that runs off and is drained away | Waterproofing and drainage — pressure is relieved |
| Seasonal aquifer | Rising water levels during periods of heavy rain | Designing to the highest standard, not the average |
| Permanent hydrostatic pressure | The basement is below water level | Complete waterproof basement envelope, joint protection, control of buoyancy in the floor slab |
The third scenario is not merely a matter of waterproofing: the water pushes the floor slab upwards, and the structural analysis must take this into account. Waterproofing keeps the water out; it does not hold the building down.
Stage 1 — Substrate preparation & separation
Before the concrete is laid, a separation geotextile separates the ground from the structure: it prevents the mixing of materials, water loss from the fresh concrete and the ingress of fine particles.
Stage 2 — Horizontal waterproofing beneath the screed
This is the most critical stage, because once the concrete has been poured, access is impossible. Two technologies:
| Synthetic membrane | Bituminous membrane | |
|---|---|---|
| Associations | Heat-sealing of seams | Thermal bonding with a blowtorch |
| Substrate | Can be laid freely | Requires an asphalt bonding primer |
| Advantage | Long service life, sealed seams | Widespread technical expertise amongst contractor crews |
| Please note | Chemical compatibility with adjacent materials | Flexibility suitable for a location not exposed to the elements |
The membrane should extend at least 50 cm beyond the edges of the floor slab, so that it can later be turned up onto the walls.
The 50 cm gap is where the waterproof basement envelope fails — and it fails before it is even completed.
Weeks lie between the horizontal waterproofing and its connection to the vertical: reinforcement, formwork, floor slab concreting, wall concreting. Throughout this period, the waterproofing lies exposed around the perimeter — it is trodden on, torn by steel bars, pierced by formwork props, soiled by cement mortar, and exposed to the sun.
When it comes to joining, the joint is often damaged or so dirty that it will not bond. And because the horizontal-vertical joint is precisely the point where water accumulates, this is where the leak occurs.
The rule: the membrane is protected from day one — folded, covered with a protective layer, and marked so that it is not walked on. And it is cleaned before installation. At ARGYNET, we specify the entire system, including its protection.
Protection prior to reinforcement
On top of the waterproofing come steel bars, spacers, labourers and concrete. Without a protective layer, every spacer is a point of pressure and every piece of steel bar is a potential puncture. Protection is provided by a cement mortar or by a heavy geotextile for mechanical protection — which has the advantage of being installed immediately, without having to wait for it to cure.
Stage 3 — Vertical waterproofing & joints
Once the walls have been erected, the horizontal waterproofing is turned and joined to the vertical waterproofing with an overlap — and the basin is sealed.
For walls, cementitious waterproofing mortars are recommended, which are incorporated into the concrete. The critical point here is the interface: two different materials meet, and their compatibility and overlap must be specified prior to installation, not on site.
The floor-to-wall joint
The waterproof basement envelope is the first line of defence. However, the construction joint between the floor slab and the wall is the point through which water will enter if the membrane fails locally. A second line of defence is provided there: a water-swelling cord or waterstop tape, installed during concreting — as it cannot be fitted afterwards.
Penetrations
Every pipe passing through the roof — drainage, water supply, electrical conduits — constitutes a hole in the roof membrane. It is sealed individually, using a water-swelling ring or a specialised fitting, attached to the membrane. Never with foam.
Stage 4 — Drainage & wall protection
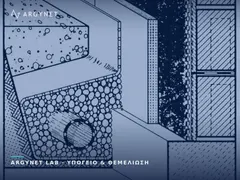
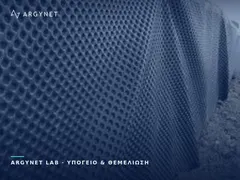
The dimpled drainage membrane protects the waterproofing during backfilling and relieves water pressure. At the base, a perforated pipe collects the water and drains it away. Where the backfill consists of fine-grained material — that is, when excavated material is reused — the membrane must have a built-in filter, otherwise the drainage channel will become clogged without warning within a few years.
The best joint is the one that is never put to the test: proper drainage means that no column of water forms on the wall, so the basin is not subjected to hydrostatic pressure.
Stage 5 — Thermal insulation
In habitable basements, the waterproof basement envelope is combined with external thermal insulation to prevent condensation. XPS is used – the only insulating material that can withstand permanent contact with damp ground without losing its thermal properties – and is installed on the outside of the waterproofing.
Below ground level, the slabs are bonded only — without dowels. Any mechanical fixing would involve drilling a hole through the waterproofing that has just been installed.
PVC membrane and XPS must not come into contact with one another.
PVC plasticisers migrate into the polystyrene. The membrane gradually deteriorates, becoming brittle and shrinking — and in a waterproof basement envelope, this happens in a place where no one will ever see it.
If a synthetic PVC membrane with external XPS thermal insulation is selected, a geotextile separator is required between them. Alternatively, a polyolefin membrane may be selected, which is chemically compatible with polystyrene and does not require a separator.
The scope of works
- Geotextile for separation in the excavation.
- Clean, smooth concrete, free from sharp edges.
- Horizontal waterproofing with an overlap of at least 50 cm beyond the floor slab — and protection of the overlap from day one.
- Protective layer over the waterproofing.
- Waterstop at the junction between the floor slab and the wall.
- Reinforcement and concreting of floor slabs.
- Concreting of walls and sealing of penetrations.
- Vertical waterproofing and connection to the horizontal — after cleaning the joint.
- Adhered thermal insulation, with a separator where required.
- Dimpled drainage membrane with a filter and a perforated pipe at the base.
- Backfilling in layers, without large stones in contact.
Separation & Protection
Horizontal & Vertical Waterproofing
Joints & Penetrations
Drainage & Thermal Insulation
Related Solutions from ARGYNET LAB
How is the 50 cm gap protected whilst waiting for the time of joining to arrive?
Request a Technical Quotation